I'm sharing my award winning (:D) 5 step method of painting Bloodletters. I only use basic techniques and the end result looks pretty good.
Introduction / rant (skip this to go straight to the painting part)
I was looking through some painting videos on miniwargaming (more specifically, a show called Quick Tips) and I was happy to notice that there are several takes on painting Warhammer Daemon models. In fact, there are several for painting Bloodletters:
- Quick Tip: Daemon Flesh (BloodLetter)
- Quick Tip: Daemon Flesh (bloodletter alt)
- Quick Tip Daemon Flesh (bloodletter black)
- Quick Tip: Daemon Flesh (bloodletter fun)
Go ahead and watch them if you want/can. They're great as idea providers. However, I wouldn't paint my Bloodletters like that. In fact, I feel that the above videos may apply to you, if you:
- own a large selection of paints;
- are already an accomplished painter;
- have a large amount of time;
- don't mind that your models look kind of "uncanonical".
None of the above apply to me (otherwise I wouldn't be writing this rant). I own a reasonable selection of paints (about 25 colors, including a single kind of wash), but nothing to compare to what Kris uses in the videos (about 5 shades of red, for starters). I have mastered the basic techniques (or so I like to think), but I wouldn't call myself a pro painter. Neither do I want to spend a large period of time per model, preferring to get them on the tabletop in a reasonable amount of time. Also, I want my models to look as canonical as possible. So there's that.
If you think you can relate to the above, read on.
If you think you can relate to the above, read on.
How to paint Bloodletters (quickly & for beginners)
Paints used (Vallejo range)
- Gory Red
- Black
- Chain Mail
- Bright Bronze
- Stonewall Grey
- White Primer
- Black Wash
- Scorpy Green, Sick Green, Ultra Marine Blue (small quantities)
Step 0. Extract your models from the sprues and glue them together. Not detailed here.
Step 1. Prime your models in white
A white primer is important, since I'm doing bright colors here. Of course black would also work, but it would require several coats of red to achieve the same brightness. That's basically a waste of time and paint.
Bloodletters primed with the graffiti spray
Step 2a. Basecoat the skin
A single coat of slightly watered down red paint will suffice here. This will save both time and paint, and will look just right thanks to the white primer underneath.

Menacing enough?
Note. In a less demanding environment, these models are tabletop-ready! Indeed, they already look a lot better than unpainted ones, and I have played some games like that - check out the battle reports.
Step 2b. Basecoat the rest of the model
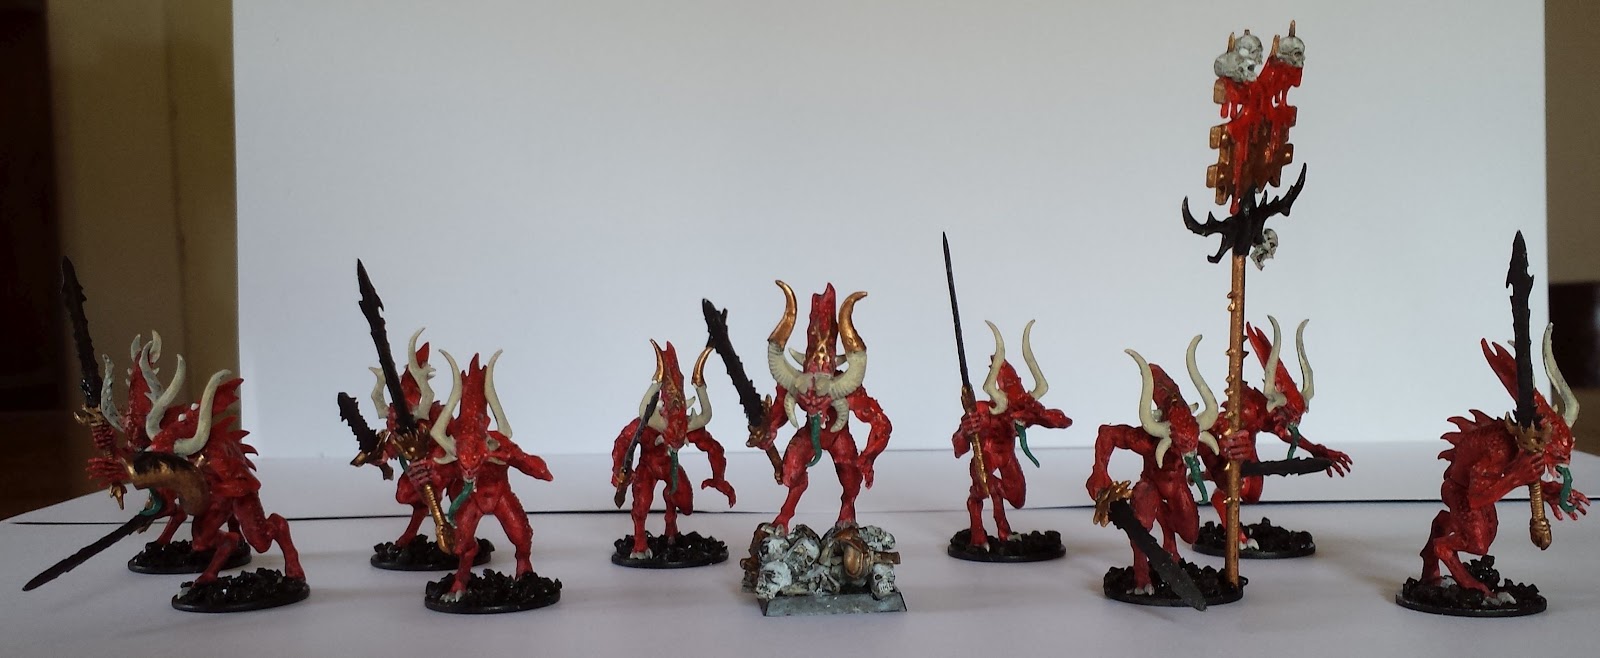
Grey for the claws on the feet. Bronze on the sword hilts. Black on the sword blades, tattoos and base. Bone white or white on the horns, teeth and other boney protrusions on the body. Various colors on the tongues.

Notes.
Since bronze is usually a weak paint, give it a coat of silver/gunmetal first, then cover it up with bronze.You can do a molten effect on the sword blade or whatnot, but I promised quick and easy solutions, so we're skipping that.
Leave the base for last, as you will most likely have paint drip on it while painting.
White works just as well on horns. I've used that for the first generation of models painted.
I used tongue color to tell the different Bloodletter squads apart. This really helps when two 20-man hordes get into the same melee. Colors used so far: neon green and blue-green. I'll do my last two squads with blue and violet.
Step 3. Wash the model with black
Water down the black wash slightly, then apply generously to the model. This will make all the details pop out (muscle groups, ridges on the horns, Khorne symbols on the sword pommels, eyes, teeth etc). It will also darken the colors; most importantly, the overall skin tone.Step 4. Overall drybrush
Drybrush the horns with white/bone white. Slightly and very carefully drybrush the sword hilt and tattoos with bronze; use a fine detail brush. Same procedure on the tongue; use the same color that you basecoated it with. Then grab your large drybrushing brush, and go over all the raised areas of the skin of the model with red: muscles, back, legs, arms, chest, head etc. This is the same effect used on the banner, to give it a bloody appearance.Note. If you can't / don't want to allocate more time for your Bloodletters, stop here and have fun wargaming!
Step 4.5 Optional. Overhead drybrush
The previous drybrush will highlight everything on the model; it will look decent, but not realistic. So I applied a second drybrushing. This time, it's an overhead passing. That means that you should take a look at your model, looking straight down on it, and mark the visible areas. This is what you need to highlight, to simulate an overhead light source, such as the sun. You can use the same red color, or add some white to it to have a more visible highlight.
Step 4.6 Optional. Correct mistakes
Drybrushing (especially if you're not very used to it) will invariably leave paint on areas where you didn't intend to. You will most likely get some red on the horns while drybrushing the head (or vice-versa, get white on the head while drybrushing the horns). So use a fine detail brush and tiny amounts of paint to correct your mistakes.Step 5. Basing
I went for a basing convention for my Daemon army. I'm basing Khorne daemons, for example, with something that looks like volcanic rock/coal - signaling the end of all life where these guys go. You can go with whatever you'd like. Just make sure you spray some sealant on the finished base or otherwise make sure it won't fall apart at the slightest touch. I used a brush to cover these bases with a matte varnish. This forms a coat strong enough to keep the little stones in place.Finished!

No comments:
Post a Comment