As an enthusiast of buying second hand miniatures, I have often got my hands on partially (or badly) painted models. Even if unpainted, the models needed work to prepare them for mounting on magnetized bases.
For specifics on what I've bought so far, take a look at Buying miniatures on eBay.
Preparatory steps: removing the base
First off, how to un-base miniatures. There are plenty of reasons to do this. It makes removing paint easier, since the miniature is smaller without its base. If the base had already been flocked, that might get ruined when applying the needed chemicals. If the model is really old, its base size may no longer fit the rules. Or you would like to port it from a square base to a round one. Or you would like to magnetize its base.Anyway, a hobby knife is needed! With some luck (and old and dried up, possibly lower quality glue), you can wedge the knife between the miniature and the base, and push it through. Applying some vertical pressure with the blade will slowly, but surely separate the two pieces. Be very careful! Too much pressure can break the miniature or the blade, so don’t get your fingers in the way.
If you’re out of luck (or the used glue was of very good quality), you will not be able to wedge in the blade, and the miniature will refuse to budge. I did not see any other solution than to actually cut through the plastic. Hold the knife as close as possible to the base, and use small, saw-like movements. I’ve got pretty good results. The miniature doesn’t show damage (maybe if you look very closely you can notice something). The base has some leftovers on it, but that doesn’t matter anyway since I’ll be mounting something on it during games. I’ll stress again how careful you have to be when doing work like this. Applying pressure or cutting through plastic using a thin blade can be extremely dangerous for your fingers (or even worse, for the miniature!). By gripping the miniature tightly, you may also apply pressure where it wasn’t needed. I managed to break off an arm and a sword like this, but I could glue them back afterwards.
Stripping paint: early attempts
If you can't get your hands on industrial grade chemicals (or would like even lower budget solutions), go ahead and read this.
Before reading up on anything on the internet (even before buying second hand miniatures), I’ve already tried to remove the paint from an Ultramarine. I’ve looked around the house - I’ve found some acetone. I applied some to a piece of cotton a stick, and I rubbed it all over the miniature. The paint went off of all the large and flat areas, but I couldn’t remove it from the eyes, joints and other finer details. I’ve later read that you can actually leave the figure in acetone over the night, and the paint comes off by itself - but it will also melt the plastic!Later, when I started repainting used miniatures, I’ve read through a couple of blogs and forums in search of a better solution. I’ve found lots of suggestions which I couldn’t apply, because I couldn’t find the mentioned chemicals (which were mostly available only in the US). So I looked up some local forums instead. Everybody was extremely helpful, and I received a load of advice. I immediately noticed two substances which are available in most households here: dishwashing detergent “Fairy” and medicinal alcohol (a.k.a. “Mona”).
I first applied the detergent. As a rule, you have to leave the miniatures in the substance over the night for softening, after which you need to rub it using a toothbrush. The first brushing removed most of the paint (again, from the large and flat areas). I applied two more brushings (each after another night in detergent), which successfully removed about 80% of the paint. Much like acetone however, it didn’t really touch the crevices which make up the fine details. Moreover, some colors (probably due to the type of paint used) did not react at all to the brushing - a shade of white and a bronze proved completely resistant. The entire process was also pretty uncomfortable, as a couple of brushstrokes immediately transformed all the detergent on the miniature into foam, and I just had to brush on without actually seeing what I am doing. This also resulted in not seeing what I’m holding, so, due to the tight grip needed to keep the miniature in my hand, I’ve my hand cut and pierced all over by the spiky bits of the miniatures. So I’ve decided to try out the alcohol.
Once again, I’ve let the minis soak over the night and then went at them with the brush. I’ve removed another 10% or so of the paint, mainly the colors that were resistant to the detergent. However, the job was still not finished. Worse, when I stuck my hands into alcohol to fish out the minis, I got stung all over due to the cuts in my skin. Talk about the dangers of the hobby!
Stripping paint off plastic miniatures
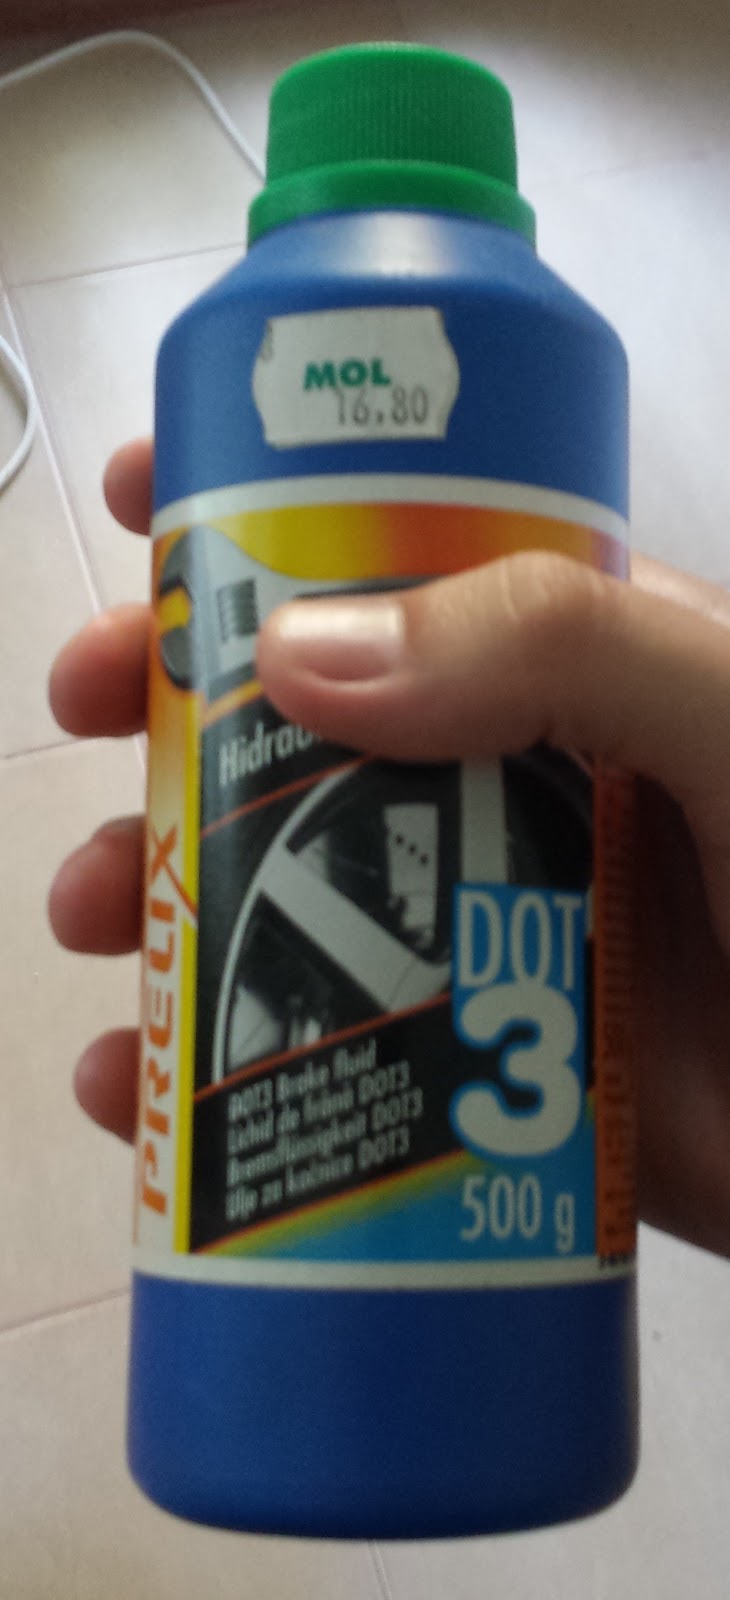
After the above adventures, I got really tired of everything, and decided to apply the final solution: brake fluid. This was the substance recommended by the most people.Brake fluid is more expensive and harder to get than detergent or alcohol (try the nearest gas station), but it’s also a lot more efficient. After a single night of soaking, the paint basically fell off at a gentle brushing. I’ve successfully removed all the paint, even from the smallest crevices! I can warmly recommend to just start out with this for anybody who wants to start such projects.
(I’ve later heard that some break fluids can melt plastic - it did not happen when I gave it a try.)
Coming up: an illustrated guide.


Notes
Break fluid has a very strong odor. If you can, do all your work outside; or at least, in a well ventilated area. In either case, you definitely want to leave the miniatures for soaking outside.If it eats paint like that, I don't think it's good for other surfaces either (or your skin, for that matter). Make sure to wear rubber or plastic gloves while working. Make sure not to drip the fluid on anything.
Brushing paint off is very messy; small particles of paint will fly off in every direction. Work in a cardboard box, or at least cover the table you're working on with paper or cardboard.
The fluid has an oily consistency. Some of it will remain on the model after brushing. After brushing, I usually put the model under running water to clean it off, then leave it in the open for a couple of days. That way, both the water and the liquid evaporates. Again, this is a heavy fluid; don't put leave the stuff to dry on a thin piece of paper, as it will quickly soak through.
Stripping paint off metal miniatures
Ever since discovering brake fluid, I've used it for every occasion to strip off paint. In one case however, it failed. Fortunately, it was a metallic model, so I could take extreme measures.

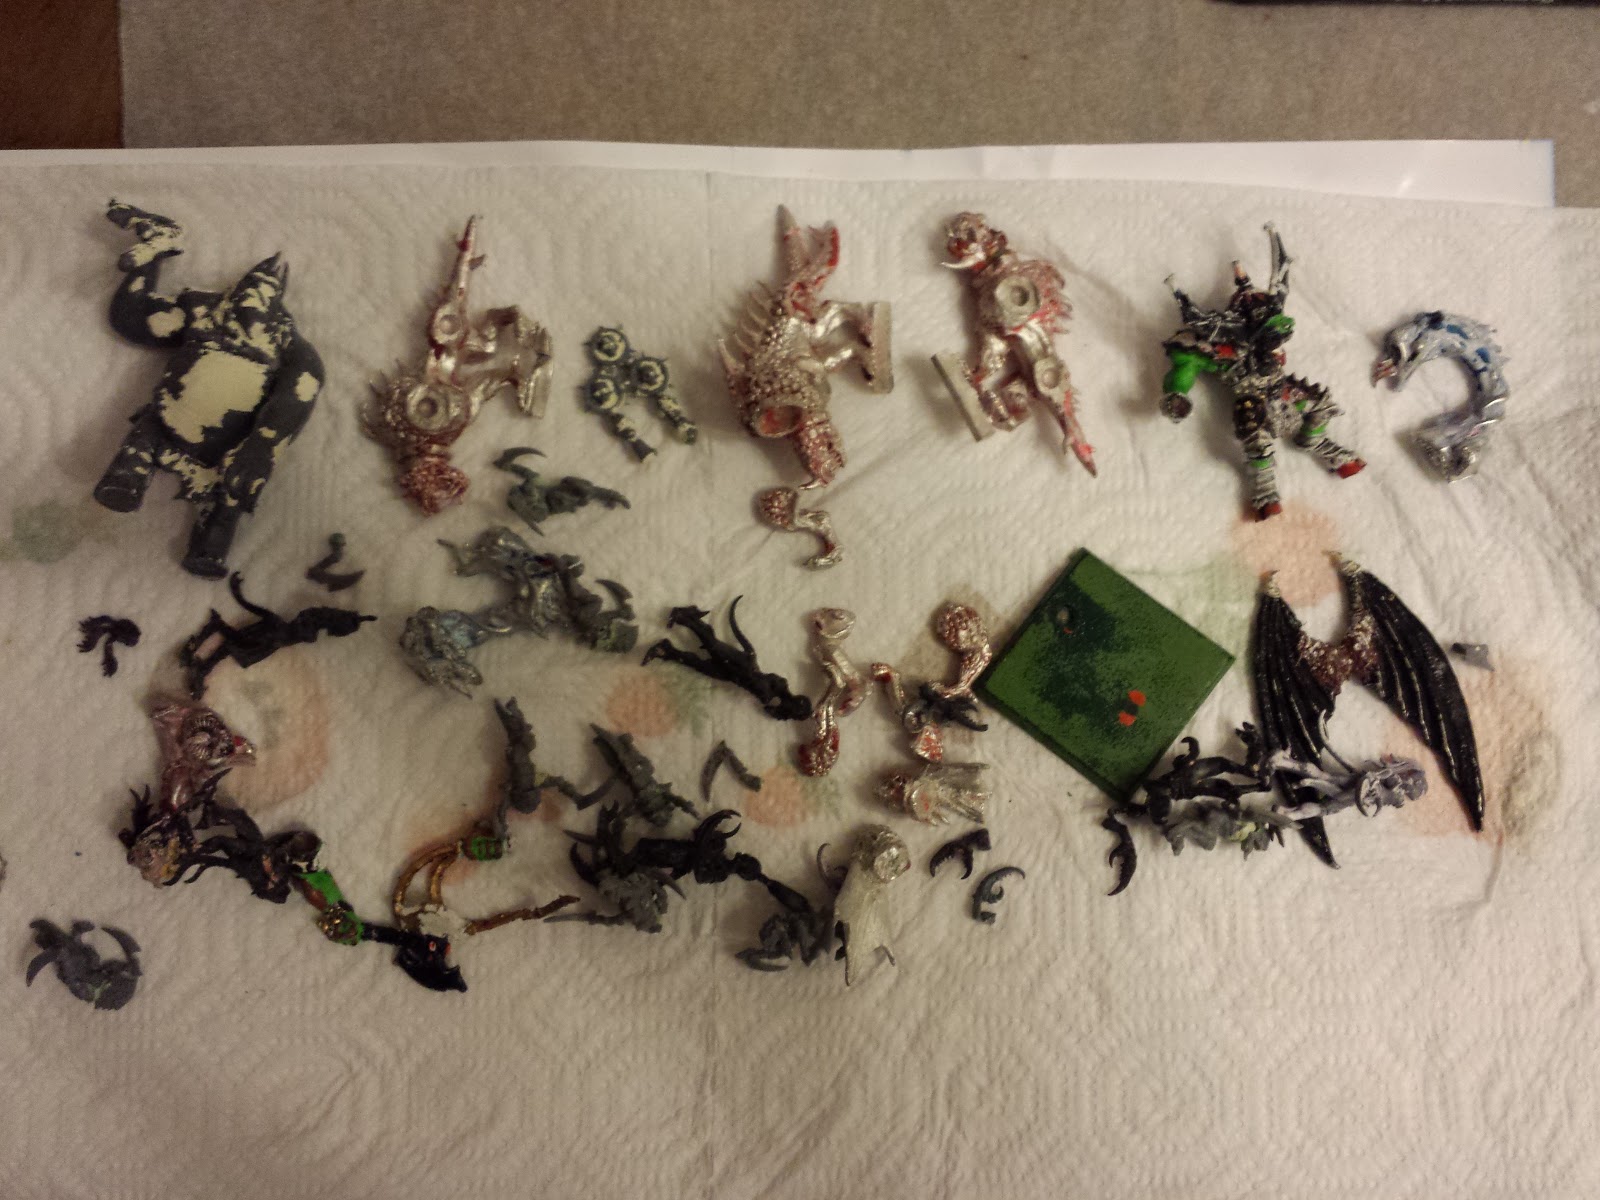
After the first soaking, most of the paint had come off of these miniatures. A second session did the job - except, of course, for this guy.
Being made of metal, I knew I could safely dip it in all sorts of chemicals not safe for plastics. Once again, I tried out whatever I could find around the house. First off, acetone!

Enter industrial grade paint remover.

Obviously, I trusted the substance too much; I filled a container (that ashtray) with the liquid and left the model in it for 30 minutes. There was some progress, but not enough.


Notes
This stuff, besides smelling nasty, is also volatile. You definitely want to do this outdoors.Do not, under any circumstance, use any containers that store food.
Do not, under any circumstance, do this in the kitchen.
Wash the model with running water (as above) and leave it to dry in a well ventilated area.
No comments:
Post a Comment